Introduction
Hello, in This blog post I will present you how I have used Houdini in Wild Run, what type of tools were created and why.
For that I have recorded a commented video to present you the principal Pipeline that I have established for Wild Run. And under this video I have put some small breakdown of the tools to have it as clear as possible for you to understand.
First, I will do a quick introduction about what is Wild Run to give you more context about the creation of this Pipeline of tools.
Wild Run is a video game prototype that was created by a team of 3 Artist and 6 Programmers as a Student Project during our 2nd School Year. The project was done in 8 weeks in the context of a school project.
Wild Run is a racing game of futuristic anti-gravity ships in a hostile and desert environment, arcade oriented, it offers a multiplayer mode with a split screen that can accommodate up to 4 players.
This game was featured on the "Made in France" stand at the PGW (Paris Games Week) 2019.
For this game we needed to create an environment that feels natural, but that fit to our Race to have a complete control over our Game Design. Our goal was also to be able to iterate on it as much as possible without having to switch between different software each time we wanted to modify the way of the Race and also have to redo everything manually.
So for that I have created a pipeline of tools with Houdini that were directly used in unity. With these Tools we were able to directly drew our Race in the engine and after a short cooking time test it in game.
If you want to see more about this project you can check it out here : https://www.artstation.com/artwork/mqN38Z
And if you want to test it and play the Game you can download it here : https://github.com/EwenCsc/WildRun
Breakdowns
Terrain Pipeline :
For the Terrain Pipeline I would love to be able to explain you everything in detail, but if I do that I would have to publish a book, so I will just quickly explain you the overall system behind it and link you some resources that you can check out if you are interested in the system.
When I start working and doing some research on this project, SideFx just released Houdini 17.5 with PDG, so I take this opportunity to use the system in our project and I set up the whole Terrin pipeline with it. In the Idea, for those that don't really know what's PDG, I was able to link some Tools in a bigger one, so instead of having to load the full terrain every time, I was able to choose at which principal step stop the Landscape generation, to not load part that were not needed at this moment and also to not have to regenerate everything every time by keeping some information in Cache. That's what give us more flexibility during the iterating process.
If you want to know more about the subject, I would recommend you to follow Kenny Lammers (aka : Indie Pixel). He made a Complete series of tutorials about Terrain Generation with Houdini using PDG, you can find the link to it here : sidefx.com/learn/collections/pdg-for-indie-gamedev/
And I would also recommend you to follow his YouTube Channel if you are interested in more general stuff about using Houdini for Game Dev.
Cliffs Mesh Generator :
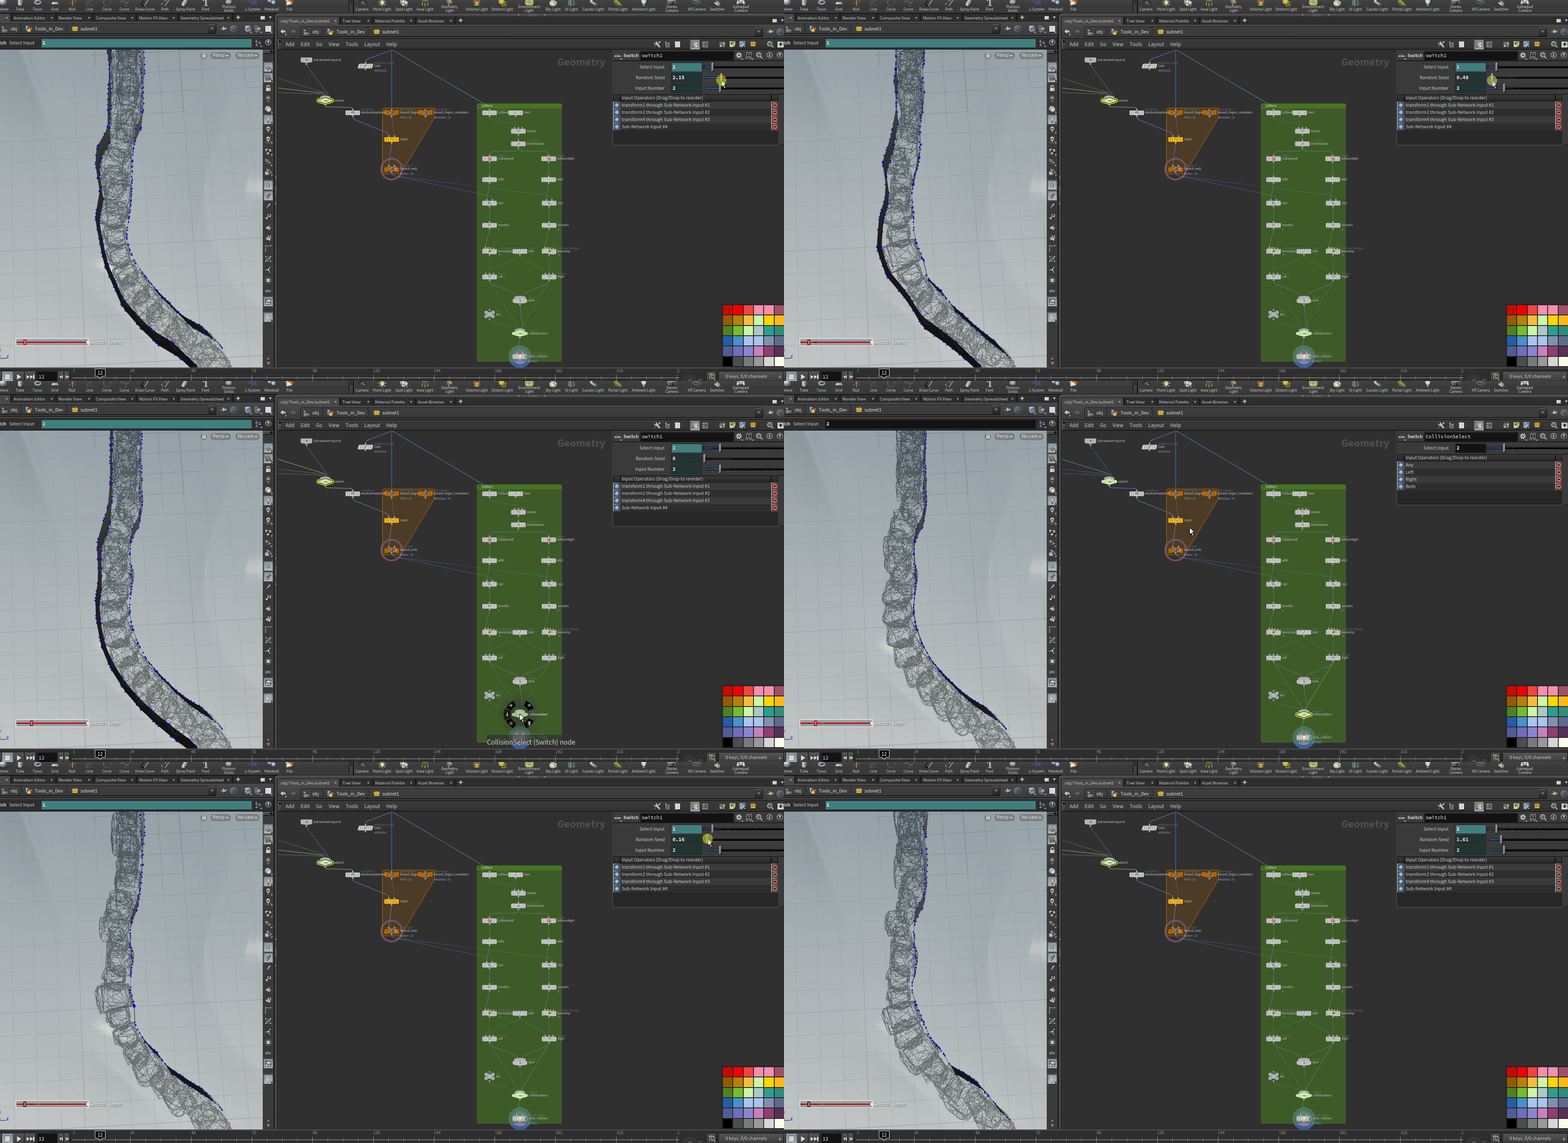
The idea behind the cliffs mesh generator was to add more volume and details to the cliffs that were generated with the Terrain. So for that I have sculpted 4 different blocks of rocks, and duplicate them on a Curve. These blocks were randomly rotated every 90°, so it allows me to have 16 different cliffs faces randomly scattered on this curve. To break the repetition, I have also added a spread angle and a small offset on these blocks to not have cliffs that are completely flat.
To have this random rotation I have simply used a for each loop that runs over the points on my curve, doing this allow me to create a metadata node that gives me access to the iteration attribute, this attribute give me a number for each iteration of the loop. When my iteration attribute is initialised I can use it in my switch node to randomly switch between my 4 different inputs. To do that I had set this expression in the Select input parameter of the node :
rand(detail("../foreach_begin1_metadata1", "iteration", 0) * ch(seed)+1)*(ch(innum)-1)with this expression I import my iteration Attribute, I use to create a random number between 0 and 1 and I multiply this random number by the number of inputs linked to my switch node.
For the random rotation and offset it's just some more math. I have created a transform node after my switch and I have set this expression to be used as the Rotate Y value :
round(rand(detail("../foreach_begin1_metadata1", "iteration", 0)+ch(seed))*4)*90 + fit01(rand(detail("../foreach_begin1_metadata1", "iteration", 0)),-ch(spread),ch(spread))this expression basically creates a random number between 0 and 1, I multiply it by 4 (the number of steps), round the product to the unit and multiply it by 90 (the angle between each step). And I add to that a random number that is remap between my spread input value.
To generate the simplified Collision wall I have reused the curve from the mesh generation, I offset it on both Sides of the cliffs and Ray cast this 2 new curve on my Cliffs geometry based on a minimum distance to only keep the exterior details and not every crevasse. As I said in the video I did that to avoid situations when some unlucky Racers get stuck in our Cliffs if they didn't explode.
Path Decals :
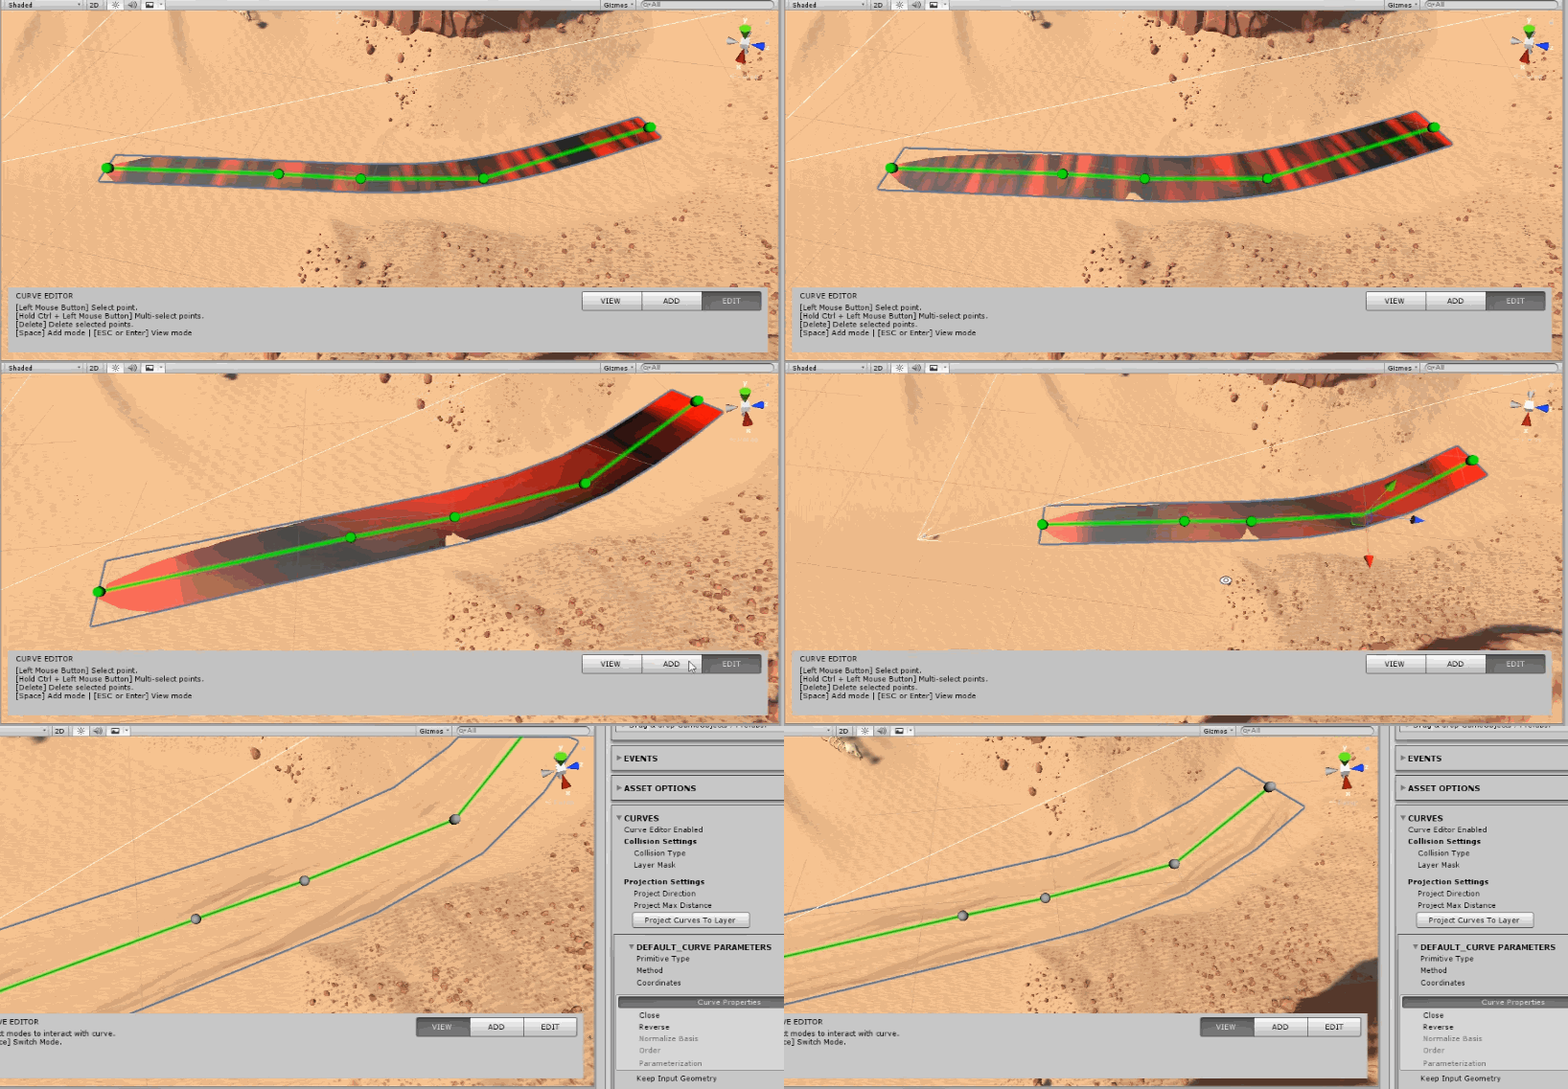
For the path decal I have generated a flat geometry that follows a curve, this geometry is unfolding along the U axis to make the texture tiled. With some vertex Color I was able to modify the opacity of my material to have a soft transition at the beginning and the end of the geometry and I also generate a noise to erase some parts and have some iregularities.
Vehicle Explosion Fx :
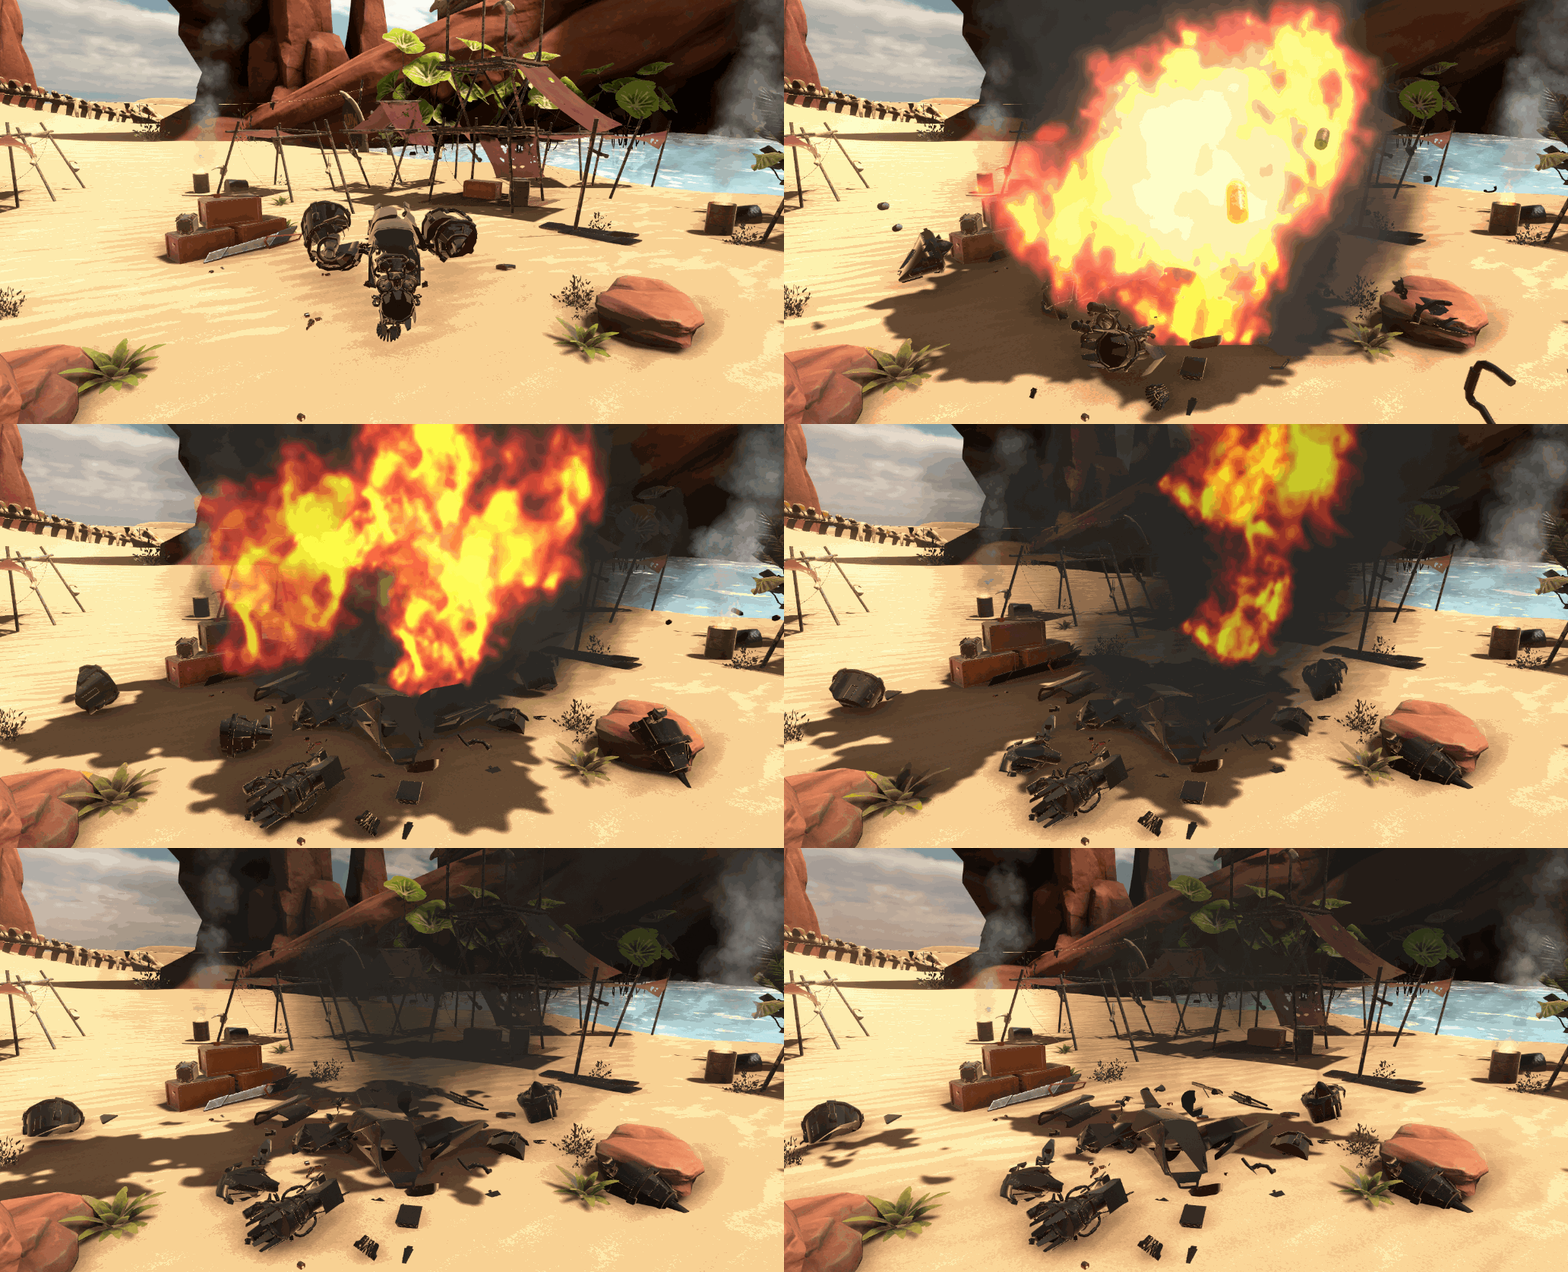
As I mention in the video at the beginning of this blog, I have also used Houdini to make the Explosion of our SandSkimmers. For this Effect I have made a smoke Simulation in Houdini and exported it as a looping texture atlas. For the fire I have just modified the smoke simulation to have a fire looks without having to do some fireballs simulations.
For the Vehicle explosion I have just created a simple Voronoi fracture on the principal pieces to break it into different parts and I have also added a layer of small debris pieces to add more details to the explosion.
So that's it for this post, I hope that was enought clear and not too long. Feel free to share any feedbacks or thoughts and if you have some questions do not hesitate to ask them below.


